
In this tutorial I’ll show you how to control 2 DC motors via bluetooth with an Android app created with MIT App Inventor 2. MIT App Inventor is a great platform to get you started with Android development.

In a previous tutorial (click here to see that project), I was controlling 1 DC motor using an app called “BlueTerm”. That app did the job, but it’s not ideal to send constantly different commands in an easy manner.
The app that you’re going to build is perfect to control any Arduino pin or to integrate with your own robot car. You can edit this app for your specific needs.
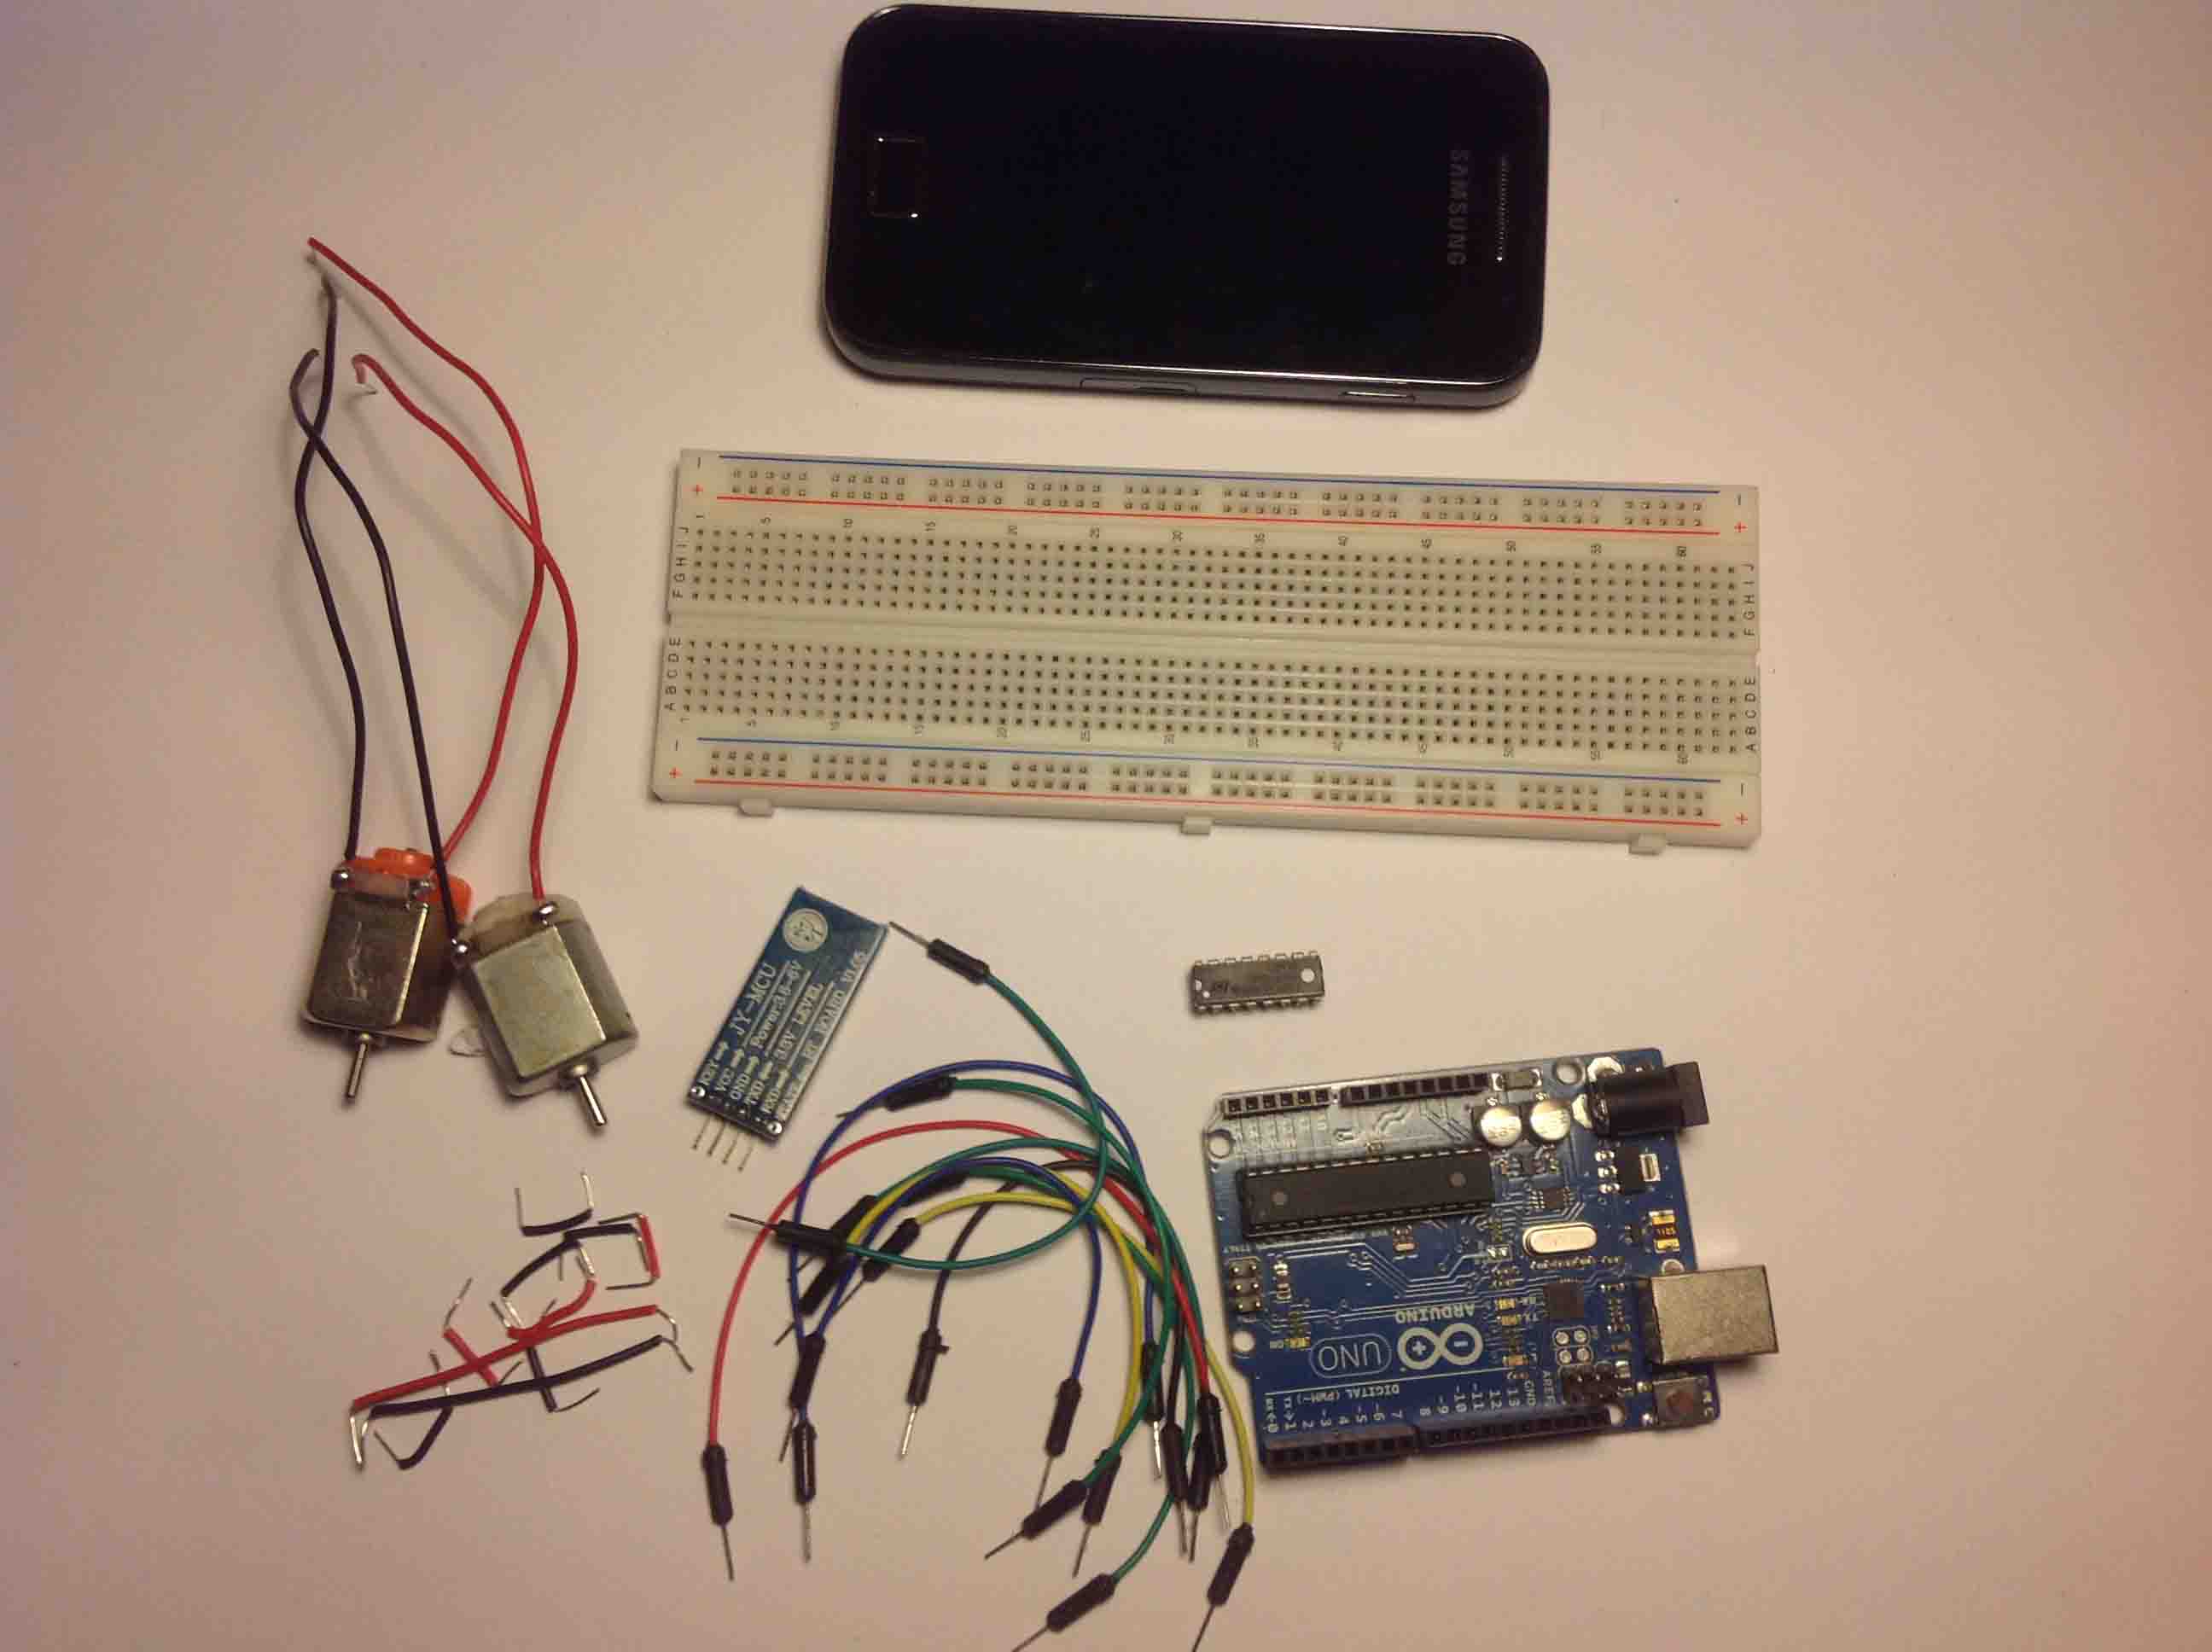
To establish the bluetooth communication between your smartphone and your Arduino, you need a bluetooth module. This project uses the HC-05 bluetooth module (as shown in the figure below).

This bluetooth module works with serial data. This means that the Arduino sends information and the bluetooth module receives it via serial (and vice-versa).
By default the HC-05 bluetooth module operates at a baud rate of 9600.
The Android App will be created using a free web application called MIT App Inventor. MIT App Inventor is a great place to get started with Android development, because it allows you to build simple apps with drag-n-drop.
You need a Google account to sign up for MIT App Inventor and here’s the login page: http://ai2.appinventor.mit.edu.
Click here to download the .aia file, then watch the video below:
If you go to the Projects tab, you can upload the .aia file for this project

With MIT App Inventor you have 2 main sections: designer and blocks. The designer is what gives you the ability to add buttons, add text, add screens and edit the overall app look.

The blocks sections is what allows to create custom functionality for your app, so when you press the buttons it actually does something with that information.

I recommend that you start by following this project and using the app without modifying it.
If want to make any changes to the app, when you’re done and you want to install the app in your smartphone, go to the Build tab.

Simply follow the installation wizard to install the app and it’s done!
For this project, you don’t need to install any Arduino libraries. So, you just have to download or copy the following code to your Arduino IDE, and upload it to your Arduino board. Make sure that you have the right Board and COM port selected.
/*
 * created by Rui Santos, https://randomnerdtutorials.com
 * Control 2 DC motors with Smartphone via bluetooth
 */

int motor1Pin1 = 3; // pin 2 on L293D IC
int motor1Pin2 = 4; // pin 7 on L293D IC
int enable1Pin = 6; // pin 1 on L293D IC
int motor2Pin1 = 8; // pin 10 on L293D IC
int motor2Pin2 = 9; // pin 15 on L293D IC
int enable2Pin = 11; // pin 9 on L293D IC
int state;
int flag=0;        //makes sure that the serial only prints once the state
int stateStop=0;
void setup() {
    // sets the pins as outputs:
    pinMode(motor1Pin1, OUTPUT);
    pinMode(motor1Pin2, OUTPUT);
    pinMode(enable1Pin, OUTPUT);
    pinMode(motor2Pin1, OUTPUT);
    pinMode(motor2Pin2, OUTPUT);
    pinMode(enable2Pin, OUTPUT);
    // sets enable1Pin and enable2Pin high so that motor can turn on:
    digitalWrite(enable1Pin, HIGH);
    digitalWrite(enable2Pin, HIGH);
    // initialize serial communication at 9600 bits per second:
    Serial.begin(9600);
}

void loop() {
    //if some date is sent, reads it and saves in state
    if(Serial.available() > 0){
      state = Serial.read();
      flag=0;
    }
    // if the state is 'F' the DC motor will go forward
    if (state == 'F') {
        digitalWrite(motor1Pin1, HIGH);
        digitalWrite(motor1Pin2, LOW);
        digitalWrite(motor2Pin1, LOW);
        digitalWrite(motor2Pin2, HIGH);
        if(flag == 0){
          Serial.println("Go Forward!");
          flag=1;
        }
    }

    // if the state is 'R' the motor will turn left
    else if (state == 'R') {
        digitalWrite(motor1Pin1, HIGH);
        digitalWrite(motor1Pin2, LOW);
        digitalWrite(motor2Pin1, LOW);
        digitalWrite(motor2Pin2, LOW);
        if(flag == 0){
          Serial.println("Turn LEFT");
          flag=1;
        }
        delay(1500);
        state=3;
        stateStop=1;
    }
    // if the state is 'S' the motor will Stop
    else if (state == 'S' || stateStop == 1) {
        digitalWrite(motor1Pin1, LOW);
        digitalWrite(motor1Pin2, LOW);
        digitalWrite(motor2Pin1, LOW);
        digitalWrite(motor2Pin2, LOW);
        if(flag == 0){
          Serial.println("STOP!");
          flag=1;
        }
        stateStop=0;
    }
    // if the state is 'L' the motor will turn right
    else if (state == 'L') {
        digitalWrite(motor1Pin1, LOW);
        digitalWrite(motor1Pin2, LOW);
        digitalWrite(motor2Pin1, LOW);
        digitalWrite(motor2Pin2, HIGH);
        if(flag == 0){
          Serial.println("Turn RIGHT");
          flag=1;
        }
        delay(1500);
        state=3;
        stateStop=1;
    }
    // if the state is 'B' the motor will Reverse
    else if (state == 'B') {
        digitalWrite(motor1Pin1, LOW);
        digitalWrite(motor1Pin2, HIGH);
        digitalWrite(motor2Pin1, HIGH);
        digitalWrite(motor2Pin2, LOW);
        if(flag == 0){
          Serial.println("Reverse!");
          flag=1;
        }
    }
    //For debugging purpose
    //Serial.println(state);
}
Note: before uploading the code, make sure you have the TX and RX pins disconnected from the bluetooth module!

You can use the preceding links or go directly to MakerAdvisor.com/tools to find all the parts for your projects at the best price!

Follow the schematic diagram in the following figure to wire your circuit.


If you haven’t generated the .apk file in a previous step, you can click here to download the .apk file (which is the Android app installation file). Move that file to your smartphone and open it. Follow the installation wizard to install the app.
Turn on your smartphone’s Bluetooth.
Tap on the newly installed app. Press the “Connect” button to connect your application to your Arduino Bluetooth module.
Now you can easily control the 2 DC motors with your app:

Troubleshooting:
Copyright ©2025. All Rights Reserved Emblab THE RAVE INNOVATION
